How to Spot a Counterfeit Silver Certificate
I’ve spent the last eight years collecting U.S. currency, and I can tell you with absolute certainty: the moment someone hands you a Silver Certificate and says “this might be valuable,” your first instinct should be skepticism. Knowing how to spot a counterfeit silver certificate separates collectors who get fleeced from those who actually build a genuine portfolio. This isn’t theoretical stuff—I once bought what I thought was a rare 1935 $1 Silver Certificate for $45 at an estate sale, only to discover later it was a decent-quality fake. That mistake taught me more about authentication than a dozen perfect bills ever could.
Why Silver Certificates Get Counterfeited
Silver Certificates occupy a strange middle ground in the currency world. They’re not rare enough to command prices that demand Fort Knox-level security, but they’re desirable enough that counterfeiters bother. A legitimate 1935 $1 Silver Certificate in good condition sells for $8–$15 to casual collectors. A 1957 bill might fetch $3–$5. These aren’t life-changing sums, but the appeal is obvious — minimal risk with decent upside if you’re running an operation.
The confusion fueling the market helps too. Many people inherit stacks of Silver Certificates and assume they’ve struck gold. They haven’t. Honest confusion creates demand for authentication guides, and it creates opportunity for counterfeiters who know most buyers won’t know the difference. The bills are nearly 70 years old, printed on equipment that’s long obsolete. Modern counterfeits often have telltale flaws that give them away if you know where to look.
The Paper Test First
Before you squint at ink patterns, feel the bill. This matters more than most guides admit.
Authentic Silver Certificates from 1935–1963 are printed on a specific cotton-linen blend — 75% cotton, 25% linen. The texture feels substantial. It’s not glossy. It’s not papery. When you rub your thumb across a real Silver Certificate, there’s resistance. A slight grittiness that modern paper stock doesn’t have. The bill has weight too. A genuine $1 bill weighs 1 gram, and you can feel the difference between that and standard counterfeits, which often use cheaper modern paper that’s either too smooth or too flimsy.
Here’s what wrong feels like: a counterfeit will be slick to the touch, almost waxy in some cases. I examined a fake 1935 $1 bill that felt like glossy magazine paper. The thickness was off too — maybe 10% thinner than the real thing. With real bills stacked in your hands for comparison, you’ll notice immediately.
The way the bill responds to folding matters. Genuine Silver Certificates have a certain suppleness. They fold without cracking. Counterfeits printed on modern paper tend to crease sharply or crack if they’re too thin. Probably should have opened with this section, honestly — the tactile test catches more fakes than people realize because counterfeiters focus on visual perfection and skip the material science entirely.
The Color and Ink Inspection
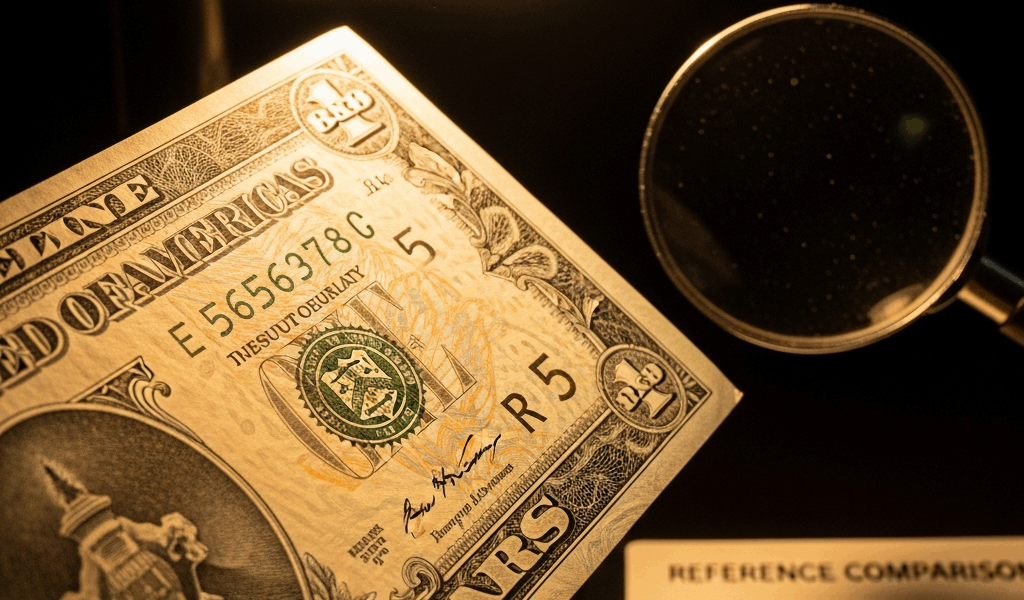
Now grab a magnifying glass. Basic ones cost $4–$8. They’re essential here.
Real Silver Certificates use a specific blue-black ink combination. The blue on the left side of the bill — the serial numbers and design elements — should be a precise shade. Not navy, not cyan, but a medium blue-black that sits between the two. Under magnification, the ink line should be clean and consistent. The edges should be sharp.
Modern counterfeits consistently oversaturate the blue. It looks too vivid, almost electric. The black ink used for portraits and fine details should be uniform in density, but fakes often have variable saturation where the counterfeiters struggled with pressure consistency during printing.
Look specifically at three areas:
- The serial numbers (top right and bottom left) — these should be crisp, with no bleeding into surrounding white space
- The portrait eyes — especially the shading around the pupils, which should be fine and controlled
- The border detail — the fine lines forming the frame should be solid, not broken or fuzzy
In a counterfeit, the serial numbers often bleed slightly. The portrait eyes lose detail. The pupils become muddy. The border lines might appear thicker or thinner than they should, depending on the counterfeiter’s equipment and skill level.
I examined a counterfeit 1957 $1 Silver Certificate once where the portrait of George Washington had slightly blurred eye detail. The black ink used for his hair was too dark. A genuine bill has finer gradation. The shading transitions smoothly. The counterfeited version looked almost flat by comparison.
Security Features You Can Verify Without Tools
Authentic Silver Certificates have four major security elements visible to the naked eye or with basic magnification. Check all four.
The Federal Reserve Seal — located on the left side of the bill, this seal should be sharp and perfectly circular. The letters inside should be readable and precise. In counterfeits, this seal is often slightly off-center or the circle is uneven. Look at the seal on multiple bills if possible. They should be identical.
The Treasury Seal — on the right side, this should also be perfectly rendered. The shield should be distinct, and the text around it should be legible without strain. Counterfeits frequently show smudging here because the seal is difficult to reproduce accurately.
Security Fibers Embedded in Paper — this is the most underused test. Hold the bill up to light. You should see red and blue fibers running through the paper itself, not printed on top. In genuine bills, these fibers are woven into the cotton-linen blend during manufacturing. In counterfeits, they’re often printed on afterward, which means they sit on the surface. You can sometimes feel this with your thumbnail.
Check Letter Alignment — the small letters in the corners (A, B, C, etc.) should be perfectly aligned in rows and columns. In counterfeits, this alignment is often slightly off. The spacing between letters should be mathematically consistent. Modern counterfeits sometimes show minor variations in spacing that real bills don’t have.
These four checks — seal sharpness, security fiber authenticity, check letter alignment, and ink consistency — will eliminate 80% of counterfeits without any special equipment.
When to Get Professional Authentication
If the bill passes all home tests and you’re still uncertain, professional grading exists for exactly this reason. PCGS (Professional Coin Grading Service) and PMG (Paper Money Guaranty) handle authentication and grading. They charge $20–$100 depending on the bill’s estimated value and the turnaround time you want. It’s worth it if you’re planning to sell or you’ve inherited a collection.
A few situations warrant professional authentication: if you’re buying from a private seller rather than a reputable dealer, if the bill shows unusual wear or restoration, or if you’re genuinely uncertain after performing these checks. There’s no shame in using professionals. Even experienced collectors send borderline cases to PMG.
What you shouldn’t do is assume online guides or YouTube videos are sufficient for high-value bills. I made that mistake early on. I trusted a video guide instead of handling multiple genuine bills for comparison. Professional graders have reference collections and lighting equipment that reveal details invisible to the naked eye. If this Silver Certificate matters financially, use them.
The reality is simple: counterfeiting Silver Certificates is a low-stakes game for both criminals and collectors. The bills aren’t valuable enough to warrant the security features of modern currency, but they’re desirable enough to attract fakes. Your job is knowing where the common flaws appear and checking methodically. Paper texture first. Ink saturation second. Security features third. If all three check out, you’ve got an authentic bill.

Stay in the loop
Get the latest bank note buzz updates delivered to your inbox.